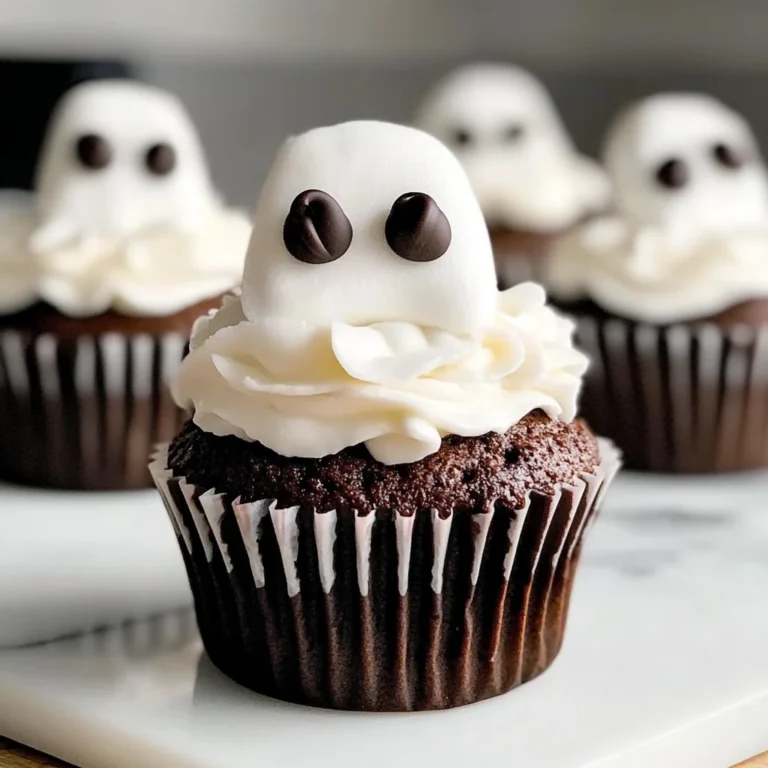
Halloween Cake Pops
Add these spooky cake pops to your next Halloween party. Halloween Cake Pops are the perfect bite-sized treats that bring festive fun to any gathering. Whether for a school event, family celebration, or Halloween party, these delightful cake pops can be customized into creative designs like pumpkins, Frankenstein, and mummies. They are easy to make and even more enjoyable to eat!
Why You’ll Love This Recipe
- Fun for All Ages: Kids and adults alike will love decorating and eating these cute cake pops.
- Customizable Designs: Get creative! Use different toppings and colors to match your Halloween theme.
- Easy to Make: With simple ingredients and straightforward steps, you can whip up these treats quickly.
- Perfect for Parties: These cake pops are a crowd-pleaser, making them ideal for gatherings or festive events.
- Deliciously Moist: The addition of pudding mix ensures a moist and flavorful cake that’s irresistible.
Tools and Preparation
Before diving into the fun of making Halloween Cake Pops, gather the necessary tools. Having everything at hand makes the process smoother and more enjoyable.
Essential Tools and Equipment
- Mixing bowls
- Electric mixer
- 13 x 9 inch baking pan
- Cookie sheet
- Baking spray
- Microwave-safe bowl
Importance of Each Tool
- Electric mixer: This helps achieve a smooth batter quickly, ensuring all ingredients blend well without lumps.
- Baking spray: Using this makes it easy to remove the cake from the pan after baking, preventing breakage.
- Microwave-safe bowl: Ideal for melting Candy Melts evenly without burning them.

Ingredients
To make delicious Halloween Cake Pops, you will need the following ingredients:
For the Cake Mixture
- 1 box Favorite cake mix
- 1 3.4 oz box instant pudding mix
- 4 eggs
- 1 cup water
- 1/3 cup vegetable oil
For the Cake Pops Assembly
- 1 cup Frosting
- Candy Melts
- Toppings – sprinkles, candy eyes
How to Make Halloween Cake Pops
Step 1: Preheat the Oven
Preheat your oven to 350°F. Spray your 13 x 9 pan with baking spray to ensure easy release after baking.
Step 2: Prepare the Batter
In a large bowl, combine:
1. Cake mix
2. Pudding mix
3. Eggs
4. Water
5. Oil
Beat at medium speed for about 2 minutes until well combined.
Step 3: Bake the Cake
Pour the batter into the greased pan and bake for 30-40 minutes. Check doneness by inserting a toothpick in the center; it should come out clean. Cool in the pan for about 10 minutes.
Step 4: Crumble the Cake
In a large bowl, crumble the cooled cake until no large chunks remain using your hands or two forks.
Step 5: Add Frosting
Add frosting to the crumbled cake mixture. Mix with your fingers until everything is well combined.
Step 6: Form Cake Balls
Using your hands, form small balls from the mixture. Aim for uniform sizes so they cook evenly.
Step 7: Chill the Cake Balls
Place formed cake balls in the refrigerator for at least 2 hours to firm up.
Step 8: Melt Candy Melts
In a microwave-safe bowl, melt Candy Melts in 30-second intervals at half power until smooth.
Step 9: Insert Sticks
Dip each stick into melted Candy Melts before inserting it into each chilled cake ball. Let them set; you can speed this up by placing them in the freezer for about 20 minutes.
Step 10: Dip in Candy Melts
Once firm, dip each pop completely into melted Candy Melts. Allow excess chocolate to drip off.
Step 11: Add Decorations
Sprinkle on your favorite decorations like chopped candy or sprinkles while still wet so they stick properly.
Now you’re ready to serve these delightful Halloween Cake Pops at your next spooky celebration!
How to Serve Halloween Cake Pops
Halloween cake pops are a fun and festive treat perfect for any spooky celebration. These delightful bites can be served in various creative ways that will impress your guests and make your party memorable.
Spooky Display Ideas
- Witch’s Cauldron: Place the cake pops in a small cauldron filled with black rocks or chocolate sprinkles for a witchy touch.
- Graveyard Setup: Arrange the cake pops in a tray surrounded by crushed cookies to mimic dirt, adding candy tombstones for an eerie effect.
Creative Packaging
- Cellophane Bags: Individually wrap each cake pop in clear bags tied with orange or purple ribbons for a charming party favor.
- Mini Buckets: Use small Halloween-themed buckets to hold several cake pops, making it easy for guests to grab their treats.
Themed Platter Arrangement
- Color-Coded Display: Group your cake pops based on their designs (pumpkin, mummy, Frankenstein) to create a visually striking platter.
- Layered Heights: Use cake stands of varying heights to elevate the display and catch everyone’s eye.
How to Perfect Halloween Cake Pops
Creating perfect Halloween cake pops requires attention to detail and a bit of creativity. With these tips, you’ll ensure that every batch is a hit!
- Use Quality Ingredients: Always choose fresh ingredients for your cake mix and frosting. This enhances flavor and texture.
- Crumb Consistency Matters: Ensure the cake is crumbled finely before mixing with frosting; this helps achieve smooth, uniform balls.
- Chill Before Dipping: Allow the formed cake balls to chill thoroughly. This prevents them from falling apart when dipped in melted Candy Melts.
- Control Melting Temperature: Melt Candy Melts slowly at medium power; overheating can cause them to seize up or become grainy.
- Experiment with Toppings: Don’t be afraid to get creative with decorations! Use colorful sprinkles, crushed candies, or edible glitter for festive flair.
Best Side Dishes for Halloween Cake Pops
Pairing your Halloween cake pops with delicious side dishes can elevate your party spread. Here are some fantastic options that complement these spooky treats.
- Pumpkin Soup: A warm, creamy pumpkin soup adds a seasonal touch and balances the sweetness of the cake pops.
- Cheesy Garlic Breadsticks: These savory bites are perfect for dipping into marinara sauce and provide a nice contrast to the sweet treats.
- Veggie Platter: Fresh vegetables like carrots, cucumbers, and bell peppers served with ranch dip create a refreshing balance at your dessert table.
- Spooky Stuffed Peppers: Carve faces into bell peppers and stuff them with rice or quinoa; they’re both fun and nutritious!
- Crispy Potato Wedges: Seasoned wedges make an excellent finger food option that pairs well with sweet flavors.
- Fruit Skewers: Create colorful skewers using seasonal fruits like grapes, oranges, and berries for a light yet delicious side.
Common Mistakes to Avoid
Avoid these common pitfalls to ensure your Halloween Cake Pops turn out perfectly.
- Not cooling the cake properly: Make sure to let your cake cool for about 10 minutes in the pan. This helps the cake firm up and makes it easier to crumble.
- Overmixing the cake and frosting: When combining the crumbled cake with frosting, mix until just combined. Overmixing can result in a dense texture that isn’t as enjoyable.
- Skipping the chilling step: Don’t skip chilling your cake balls for at least 2 hours. This step ensures they hold their shape when dipping in melted Candy Melts.
- Using too hot Candy Melts: Melt your Candy Melts in short intervals to avoid overheating. If they’re too hot, it can cause your cake pops to fall apart when dipped.
- Neglecting decorations: Be creative with toppings! Adding sprinkles or candy eyes enhances the festive look of your Halloween Cake Pops and makes them more appealing.

Storage & Reheating Instructions
Refrigerator Storage
- Store Halloween Cake Pops in an airtight container.
- They can last up to 1 week in the refrigerator.
Freezing Halloween Cake Pops
- Wrap each cake pop individually in plastic wrap before placing them in a freezer-safe bag.
- They can be frozen for up to 3 months. Just make sure they are completely set before freezing.
Reheating Halloween Cake Pops
- Oven: Preheat to 250°F and warm for about 5-10 minutes. This method is best for keeping them crispy.
- Microwave: Heat on a low power setting for about 10-15 seconds. Be careful not to melt the coating completely.
- Stovetop: Place a small pot over low heat and cover with a lid. The steam can help soften them without melting the chocolate.
Frequently Asked Questions
Here are some common questions about making Halloween Cake Pops.
Can I use any cake mix for Halloween Cake Pops?
Yes, you can use any flavor of cake mix you like! Vanilla and chocolate are popular choices, but feel free to experiment with others.
How do I decorate my Halloween Cake Pops?
You can use sprinkles, candy eyes, or melted chocolate to create fun designs like pumpkins or mummies. Get creative!
How long do Halloween Cake Pops last?
When stored properly in an airtight container, they can last up to one week in the refrigerator or three months in the freezer.
Can I make these Halloween Cake Pops ahead of time?
Absolutely! You can prepare your cake pops a few days ahead and store them in the fridge or freezer until you’re ready to serve.
What are some customization options for Halloween Cake Pops?
You can alter flavors by using different extracts, add colored Candy Melts for various designs, or incorporate different toppings based on your theme.
Final Thoughts
These Halloween Cake Pops are not only fun but also versatile treats perfect for any spooky celebration. With endless customization options, you can create unique designs that will impress your guests. Give this recipe a try, and let your creativity shine!
Halloween Cake Pops

Get ready to impress your guests this Halloween with delightful and spooky Halloween Cake Pops. These bite-sized treats are not only fun but also incredibly easy to customize, allowing you to create various designs like pumpkins, mummies, and Frankenstein. Perfect for any gathering—whether it’s a school event, a family celebration, or a festive Halloween party—these cake pops combine moist cake with creamy frosting and colorful candy coatings. With simple ingredients and straightforward steps, you can whip up these adorable snacks in no time. Everyone will love decorating and indulging in these cheerful treats that bring festive fun to any occasion!
- Prep Time: 15 minutes
- Cook Time: 40 minutes
- Total Time: 55 minutes
- Yield: Approximately 24 servings 1x
- Category: Dessert
- Method: Baking
- Cuisine: American
Ingredients
- 1 box favorite cake mix
- 1 3.4 oz box instant pudding mix
- 4 eggs
- 1 cup water
- 1/3 cup vegetable oil
- 1 cup frosting
- Candy melts
- Toppings (sprinkles, candy eyes)
Instructions
- Preheat your oven to 350°F and spray a 13 x 9-inch baking pan with baking spray.
- In a large mixing bowl, combine the cake mix, pudding mix, eggs, water, and oil; beat for about two minutes until smooth.
- Pour the batter into the prepared pan and bake for 30-40 minutes until a toothpick comes out clean. Cool for ten minutes.
- Crumble the cooled cake into a bowl and mix in frosting until well combined.
- Form small balls from the mixture and chill in the refrigerator for at least two hours.
- Melt candy melts in a microwave-safe bowl at half power until smooth.
- Dip each stick into melted candy before inserting it into each chilled cake ball. Let set.
- Dip each pop in melted candy melts and add decorations while wet.
Nutrition
- Serving Size: 1 serving
- Calories: 140
- Sugar: 12g
- Sodium: 90mg
- Fat: 6g
- Saturated Fat: 1g
- Unsaturated Fat: 5g
- Trans Fat: 0g
- Carbohydrates: 20g
- Fiber: <1g
- Protein: <2g
- Cholesterol: 25mg